Photoshop is a photo-editing, graphics design, and image-changing software by Adobe. It is a popular choice for graphic designers, photographers, digital marketing experts, and social media influencers. Adobe Photoshop has multiple tools for image creation, editing, skin tone adjustment, graphics design, and manipulation.
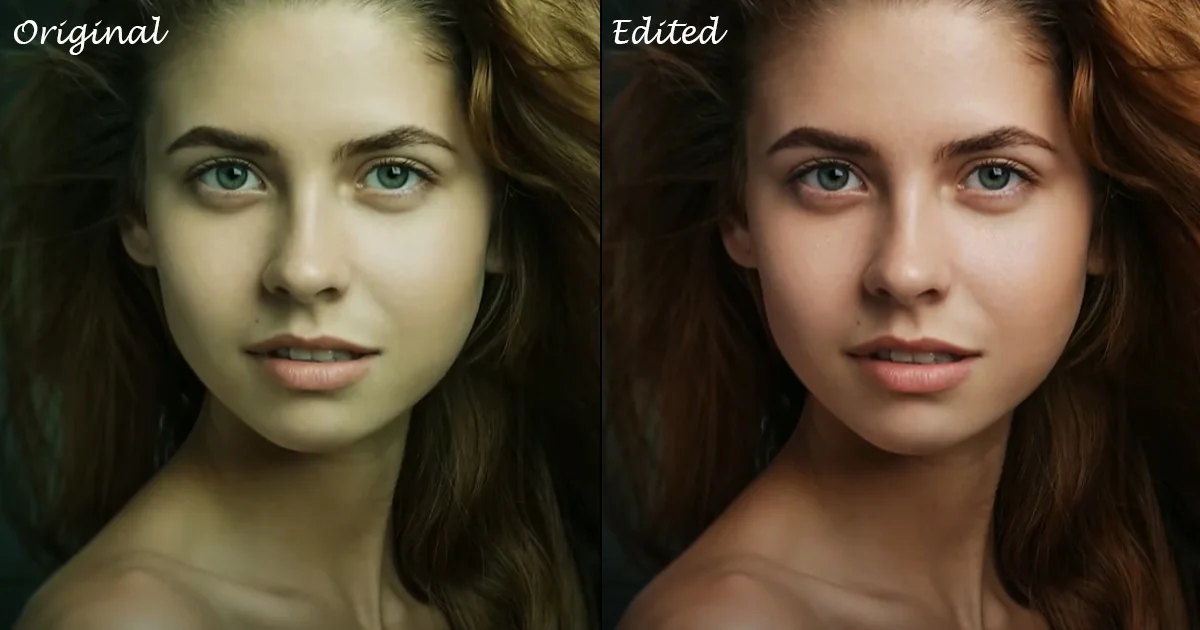
In photography and graphics design, correct and natural skin tone adjustments are very important. It provides a realistic and overall aesthetic look to the images. That’s why skin tone adjustments are performed in images carefully and in a couple of steps. Check below for details of the steps.

Open Your Image in Photoshop
First, click on your Photoshop application from the desktop. You will see the menu bar at the top of the screen on the left side. Click the file in the drop-down list and see the ‘open’ option. If you click on this button you will get the ‘file explorer’ window.
Also, you can use a shortcut system to open an image by using your keyboard. Click ‘Ctrl+0’ at a time to open the file explorer directly in your window, and on your Mac Click ‘CMD+0’.

Tips for Choosing the Right Image for Skin Tone Adjustments
For smooth skin tone adjustments select a high-resolution photo so that you will get an accurate HD result with more details. Check the image has natural lighting without harsh shadow. And try to select an image where skin tones are quite natural and visible. Use the original raw version of the pictures that have not been edited before. If you use a photo that is already edited or not in HD quality it can make the process of skin tone adjustment complicated.
Select the Area with the Skin Tone
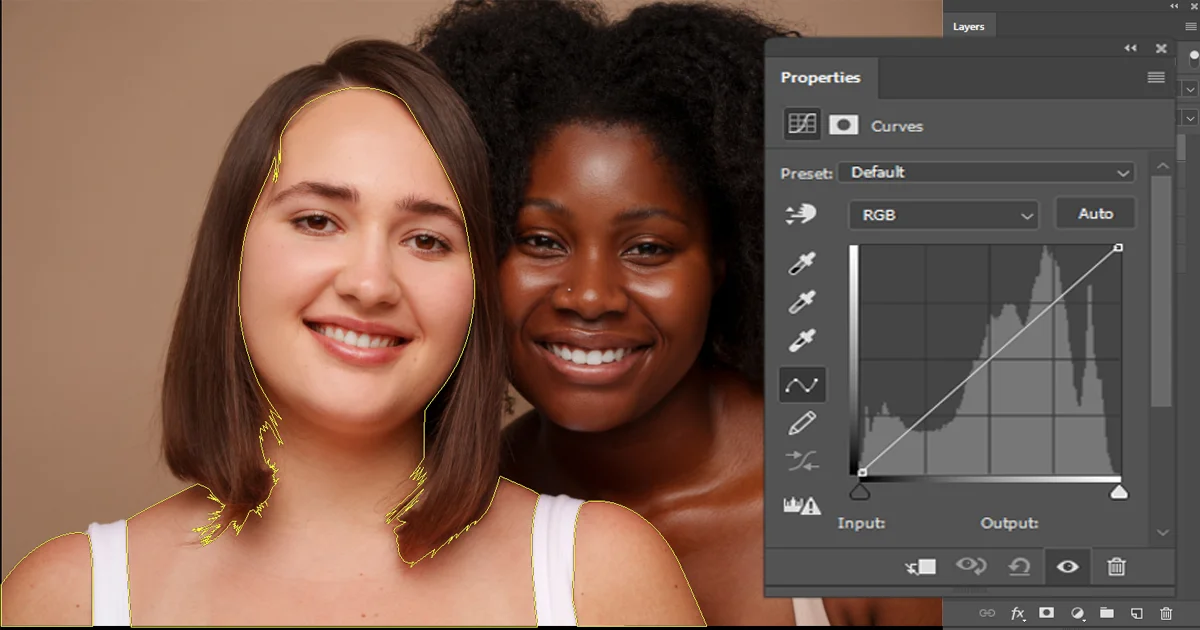
In this step, you need to select the area in the skin tone that you want to adjust. In that case, you can use the Quick Selection Tool or Lasso Tool.
Quick Selection Tool
From your toolbar open Quick Selection Tool or you can press ‘W’ on the keyboard to open the tool, after clicking and dragging the skin area for tone adjustment. The tool has the features of automatic detection of edges and it can identify colors and skin texture for adjustments.
Lasso Tool
Open the Lasso tool from your toolbar or press ‘L’ to open directly. Lasso tools are typically 3 types Regular Lasso tool, Polygonal, and Magnetic.
You can use the regular version to select the area independently or you can use the Polygonal Lasso tool for straight edge selections and snap edges using the Magnetic version. After that click the create points in the skin area for adjustment and click the starting point for closing the selection.
Tips for Making Precise Selections
To make a precise selection follow these steps.
Zoom In
Zoom the area of an image that area you are selecting for adjustment to get an accurate selection and to avoid scribble.
Adjust Brush Size
Proper adjustment of your brush is important in selecting a detailed area, and to do it use the bracket keys for decreasing and increasing the brush size.
Smooth edges
To create smooth edges adjust the ‘Smooth and Feather’ settings in the ‘Options’ bar.
Refine The Selection With ‘Select and Mask Feature’
After completing the selection in your images now it’s time to refine the selection. Click on the ‘Select and Mask’ option in your Options bar. For refining the edges select view mode for a clear view of edges, for adjusting the edge detection use ‘The Radius slider.’ You can use ‘Smart Radius’ to automatically adjust your selected area in a photo. To refine one more time the edges apply Feather, Smooth, Contrast, and Shift Edges sliders. Select output settings to decide the application in your selected area, and click ‘OK’ for applying refinements.
Create a New Adjustment Layer
Adjustment layers are a kind of constructive method for applying color and adjusting tone in your images. With adjustment layers, you can adjust and modify your images slowly which doesn’t change your original version permanently.
Adjustment layers are a kind of constructive method for applying color and adjusting tone in your images. With adjustment layers, you can adjust and modify your images slowly, which doesn’t change your original version permanently.

How to Create a New Hue/Saturation Adjustment Layer
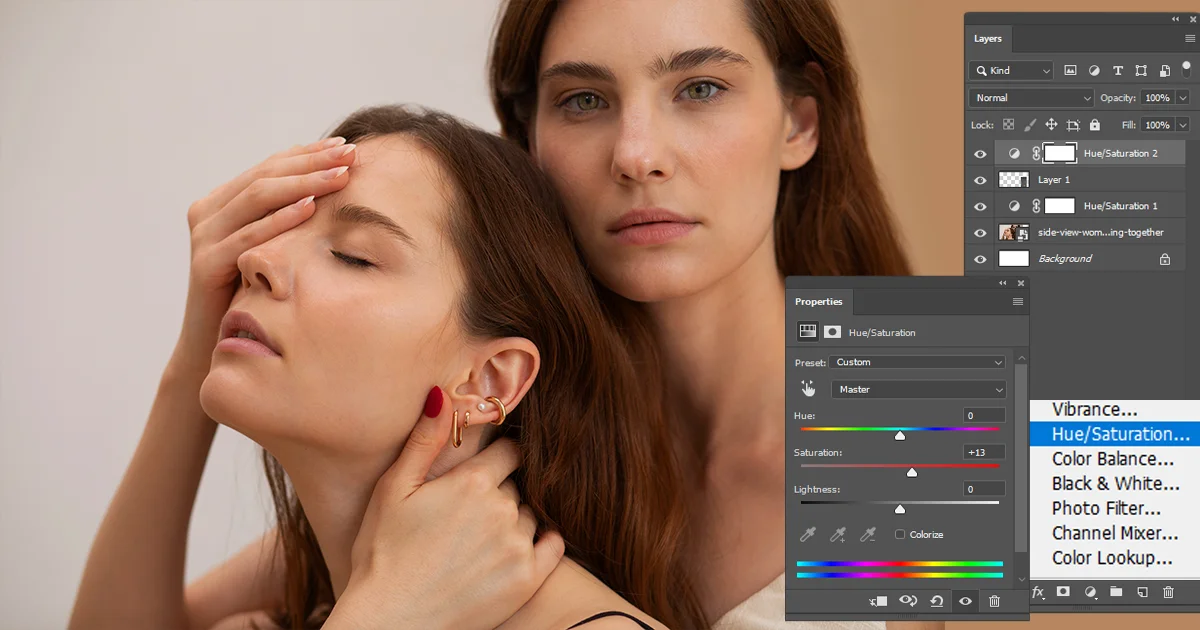
Open the Layers Panel in your computer from your Window. After that, you will find an Adjustment Layer icon at the top of the Layers panel. Click on that and select the Hue/Saturation option in the adjustment layer menu, to create a new Hue/Saturation adjustment layer over the currently selected layer.
Attaching the Adjustment Layer to the Selected Area
Active the area you already selected with the Quick Selection Tool or Lasso tool. After that, the new Hue/Saturation adjustment layer will be applied to the selected area automatically. Then you need to adjust the Hue/Saturation setting section.
Go to the properties panel with the selected Hue/Saturation adjustment layer, and you can tint the area you want with the ‘Colorize’ option. To change the skin tone color, adjust the Hue slider. Use the Saturation slider to increase or decrease the strength of the color in the skin tone. Apply the Lightness slider to dark or light skin tones.

Fine-Tuning with Additional Adjustments
For the further refinement, you can use Curves or Level adjustment layers:
Curves Adjustment Layers
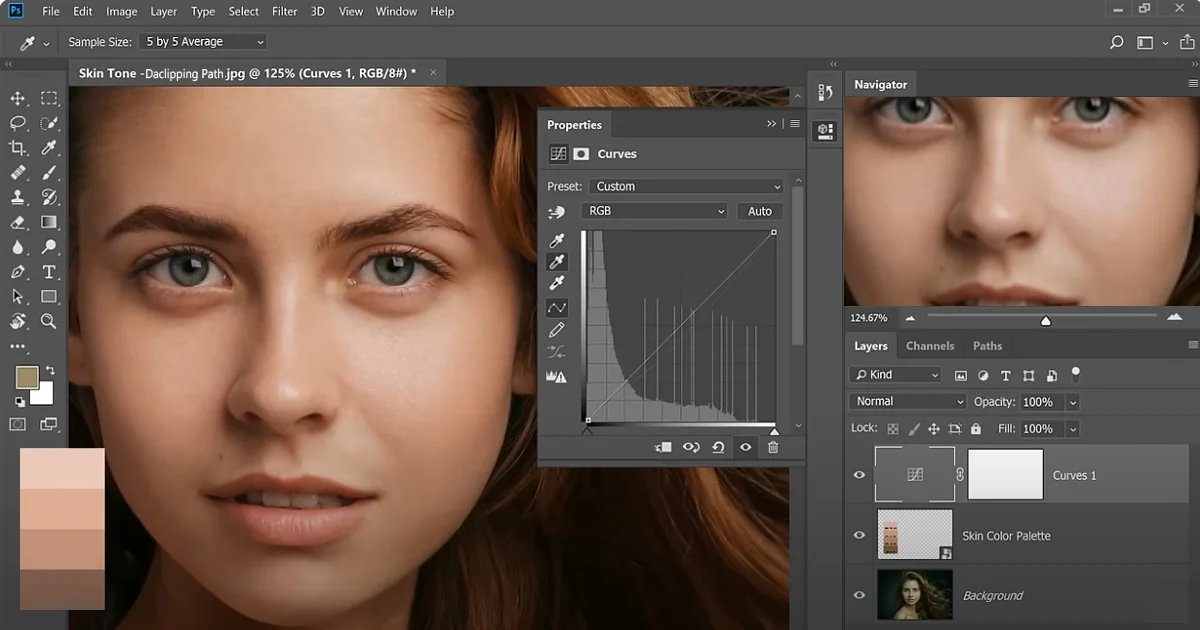
Click on the Adjustment Layer icon at the top of the screen in the Layers panel and create a curves adjustment layer, and in the ‘Properties’ panel you will find a graph with a line click on the line for adjusting the curves, drag the top-left point in upward for lighten shadows and for darker shadow drag the point downward, click the line in middle and drag upward for lighting mid-tones and drag downward for dark tone. For highlighting the area drag the top right point upward or downward to get light or dark highlights.
Levels Adjustment Layers
Click on the Adjustment Layer icon at the top of the screen in the Layers panel and create a Levels. In the ‘Properties’ panel you will find a histogram with three sliders for adjusting the levels. Click and drag the left slider to the right for adjusting shadows, click and drag the middle slider to the left to adjust mid-tones for lighter shade, and drag to the right for dark tones. Drag the right slider for highlighting.
Adjust Shadows, Mid-Tones, and Highlights to Enhance Realism
To enhance realism and make the photo natural you may adjust Shadows, Mid-Tones, and Highlights:
To fine-tune the shadows and adjust shadows in your selected area, apply the Curves or Levels adjustment layer. It’s better not to use excessive dark or light shades to maintain the natural vibes of the images.
Mid-tones are an important part of skin tone appearance. In the Levels adjustment section, you will find a mid-tone slider, use this option to fine-tune the selected area, or you can use the middle part of the curve in the Curves adjustment section. It’s important to blend mid-tones smoothly with shadows and highlights.
Highlights also need to be adjusted properly for appropriate skin looks. In the Levels adjustment section use the top part of the curves adjustment to adjust the highlights.
Final Touches
Check the overall image for consistency
Zoom the entire image and make sure that the adjusted skin tone you edited blended smoothly, look for any unnatural skin tone and adjust again if needed. Click the ‘eye’ icon and compare the before and after looks so that you can recheck the differences you made.
Making Minor Tweaks to Ensure Natural Results
To make sure that you have the best natural result and smoothness, blend the edges of the skin tone with the Blur tool, and balance it with the rest of the image. After that select the layer mask thumbnail of the adjustment layer for refining. You can use black or white paint to refine the areas make sure the brush is soft, and adjust the opacity too if needed.
Now, go to the Hue/Saturation, Curves, Levels adjustment layers section and create minor tweaks to the sliders. To get a perfectly natural look a small adjustment is also important. If you see any blemish that needs one more correction apply the healing brush tool for touch-up, and if you want to enhance the image further you can use different types of filters or effects suitable to your image.
Finalize and Save
Once you finished your editing and you are impressed with the result save the image in a format that stores layers of your adjustment, such as you can use the ‘PSD’ format so that you can edit again in the future. Save the image in JPEG/PNG format for sharing the picture.
Why is it Important for a Picture?
To get a natural look realistic vibes and good-quality images, it’s important to adjust and change the skin tone of an image by using Photoshop. A professional image requires multiple layers of adjustment and to maintain professionalism photographers utilize all the services connected to Photoshop. Such as color correction services, and image masking services.
Can We Make a Similar Tone to Multiple Photos? How?
Yes, it’s possible to make a similar skin tone in multiple photos, and to do this, you need to open each photo in Photoshop and apply adjustment layers like Hue/Saturation and curves to match the skin tones of each image. Apply ‘Color Picker’ for adjustments to the skin tone. Finally, Fine-tune the images by using layer masks and blending tricks for accuracy and you will get a professional look in your all photos.
Conclusion
To conclude, natural-looking HD skin tones in images are very important for using the image professionally. Many brands need a natural skin tone and quality images of models for advertising purposes, and to get this they utilize Color correction services, Clipping path services, Image masking services, and Photo retouching services. With the help of clipping path services and image masking services, you can adjust particular areas based on the requirements. and to refine your adjustment you need photo retouching services.
