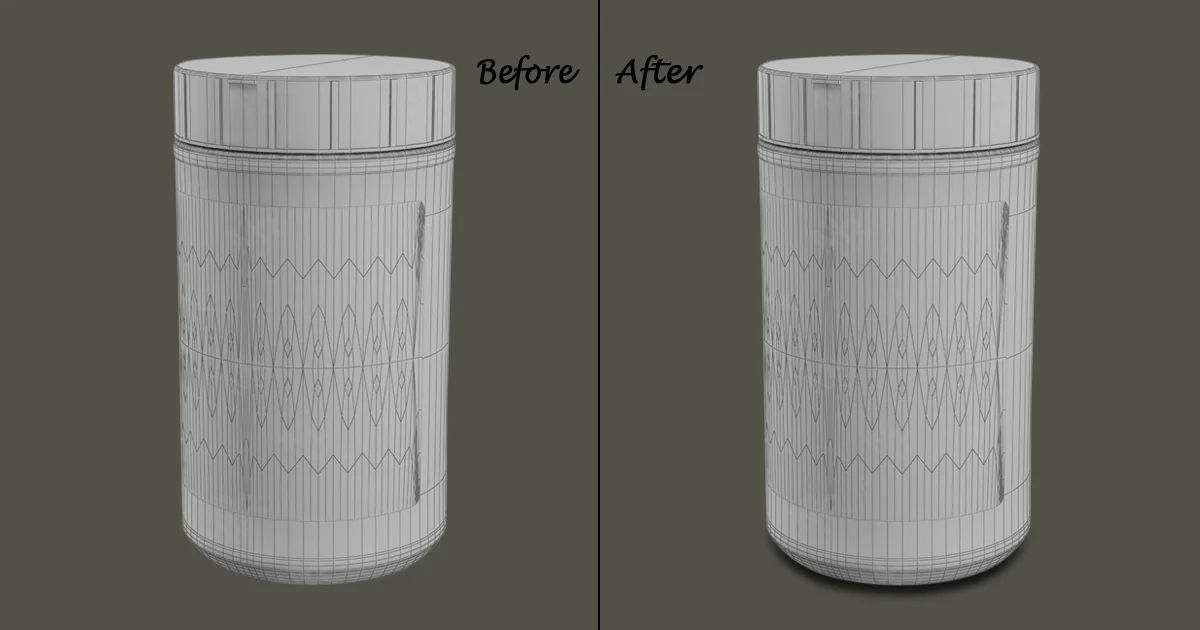
Creating a drop shadow in Photoshop requires multiple steps like opening your image in the software to fine-tune your work. One can create lifelike drop shadows with a group of steps to enhance the image quality.

What is a Drop Shadow in Photoshop?
Drop shadow in Photoshop software is mainly an effect. It adds shadow in the image mainly in the behind of the subject. It seems a real shadow appears from far away, giving the image a depth illusion. You can customize the shadow’s visualization by adjusting the opacity, distance, and size of the shadow.
Why is the Use of Drop Shadow in Photoshop Important?
Drop shadows are used in Photoshop for multiple reasons. Such as:
To create Depth & 3D Effect:
Drop shadows are important for creating a 3D effect and depth vibes in a plain image. Carefully add a drop shadow and adjust it with the overall image’s angle to get a realistic outlook.
Improve Visualization of Important Parts:
Drop shadows help to highlight the most important part of the photo. It is added in the photo by the professionals in such a way that it creates a visual hierarchy. That helps to keep the viewer’s attention on the major subjects. Normally they utilize Image Shadow Creation Services to create a drop shadow successfully.
Improve the Details:
It improves the details of the image and text if it is placed perfectly. Drop shadows establish a contrast that can distinguish the text or subjects from the background. And it makes the details easy to catch.
Create Aesthetic Visualization:
To get aesthetic visualization in your images apply drop shadows. It will leave your photo with a polished and clean vibe.
Make the light more natural:
Drop shadows reflect with the real natural light and make the light more natural. This can be useful for e-commerce image editing, Digital artwork, or 3D modeling.

Step-by-Step Guideline for Creating a Drop Shadow in Photoshop
Open Your Image in Photoshop:
First, open your image in the Photoshop tool, on which you want to create a shadow. Go to the file option click on Open and select file.
Duplicate the Layer:
Now duplicate the layer to keep the original version of the image for future needs. Go to the Layers panel and click on the right side of the mouse. Select duplicate layer. You can duplicate directly by using the shortcut method. In Windows press Ctrl+J and on Mac press Cmd + J.
Create the Shadow Layer:
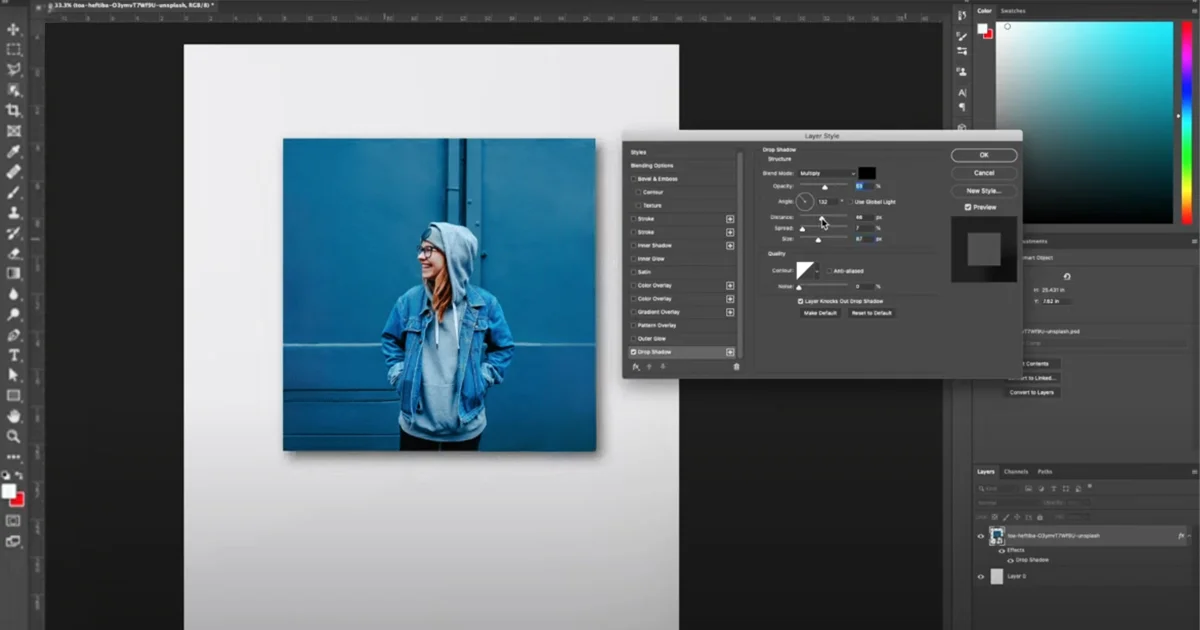
Now select the duplicate layer and add a drop shadow to the duplicate layer. Check the Layers panel and click on the ‘fx’ icon. Select the drop shadow that you want to apply to your photos.
Adjust the Shadow Settings:
In the Layer Style dialog box customize the settings of your Drop Shadow Settings. Here you will get multiple options such as:
- Blend Mode: It’s normally preset multiply to get a realistic effect of the shadows.
- Color: It’s usually in black and dark shades. And it is better in that way.
- Opacity: You have to adjust the opacity to control the transparency of the drop shadow.
- Angle: Fix the angle of the shadow based on the subjects. Be careful to match with the direction of the light source.
- Distance: Calculate the distance and set the shadow according to the distance of the subject.
- Spread: Modify the ‘spread’ to control the size expansion of the shadow.
- Size: Adjust the size of the drop shadow in Photoshop to make it real and control the blurriness.
Fine-Tuning the Shadow:
Once you finished creating a drop shadow in your photo, now it’s time to fine-tune. It will improve the overall appearance of images. Follow the below steps for fine-tuning the drop shadow:
Step 1: Adjust Shadow Position and Angle:
From the Layers panel double-click on the drop shadow effect and open the ‘Layer Style dialog box.’ Apply the angle wheel or add a specific value to set the direction of the light source. This will decide the shadow’s position in the image. Now adjust the distance of shadow based on the subject. You can set it closer to the subject or away.
Step 2: Modify Shadow’s Visualization:
Increase the spread to make the drop shadow more polished and original. Adjust the shadow’s size, the smaller size will give a sharper look and the bigger size will create a soft look.
Step 3: Contour and Noise Adjustments:
Open the contour editor by clicking on the ‘contour preview’ option. Here you will get different types of contour shapes to change the falloff of the drop shadow. Select one shape. It will work on the transition of the shadow from dark to light.
Step 4: Color:
Select a different shadow color from the color box if needed. Black is the common color used by most editors. However, you may apply another color to create an artistic illusion.
Step 5: Global Light Settings:
Check the global light and make sure that all shadows follow the same angle of the light source.
Step 6: Refining with Multiple Shadows:
It is an advanced option you can apply to create any complex shadow effects. Click the ‘+’ icon next to the ‘Drop Shadow’ option in the Layer Style dialog box. Here you will get multiple drop shadow effects. Add the shadow effects multiple times if necessary.
Step 7: Preview and Fine-Tune:
Now preview your changes and modify further if needed. It will help you to achieve the perfect drop shadow effect.
Step 8: Final Touch:
As you are satisfied with your work and visualization of the shadow Click ‘OK’ to utilize the changes.
Save and Load Default Settings for Drop Shadow in Photoshop
You can save custom layer style settings, including drop shadows in Photoshop. And you can apply them to other layers in other projects. Here is the process to save and load Default Settings for Drop Shadows:
Saving Default Drop Shadow Settings:
First and foremost, open the Layer Style dialog box. Double-click the layer in which you want to apply drop shadow. You can customize the drop shadow settings to your advantage. After configuring the drop shadow save the layer style.
On the right side of the Layer Style dialog box, you will see the New Style option. Click on that and give your style a different name. For example, ‘Default Drop Shadow. Check the drop shadow in the ‘Include Layer Effects option’ and ensure that it is saved. Now press ‘OK’ to save your style.
Now you will get your saved style in the Styles panel. Also, It will be found in the Styles section of the Layer Style dialog box.
Loading Default Drop Shadow Settings:
Go to your window and open the ‘Styles Panel.’ After that, select the layer and apply your saved drop shadow style from the Styles panel. If it needs any more modification, Fine-tune it with another adjustment.
In addition, the creation of a drop shadow in Photoshop is a unique and powerful feature. It helps to add a realistic mode, a sense of depth, and an aesthetic point of view to the photos. The clipping path service can help you to create a lifelike drop shadow in your images. Carefully apply the steps to create drop shadows easily. If you follow the Avobe steps and techniques it will improve your Photoshop skills as well as improve the quality of your artwork.